I recently went on a business trip for work, leaving my 5 month old (and 3 and 4 year-old) home with dad. As we are still exclusively breastfeeding, it was essential that I pump and store while traveling. As this trip was only about 3.5-4 hours from home, my colleague and I were able to travel by car which made the transport process super easy. This post is part one of two, since later this year I’ll be traveling via plane for a second conference, and I’ll need to riddle out the logistics of flying with breast milk and pumping accessories.
Oh and did I mention I’m an over-producer? When I’m away from baby and exclusively pumping, I’m storing between 50-70 ounces a day. Sometimes more, so storage is key.
Packing
Let’s start with what to pack. Whether flying or driving, “keep it simple” is my motto. Start with your pumping bag, then add your pump (if it’s not built into the bag), tubing, back-flow protectors, duckbills, flanges, bottles, and storage bags. You may want to carry extras of some of these items (especially smaller pieces, like duckbills, which always seem to disappear). Oh, and if you’re still in the “leaky” phase, be sure to pack some breast pads to avoid any embarrassing situations. There’s nothing quite like suddenly having a wet shirt when talking to a colleague…
For this trip I choose to use the Kiinde system and pump directly into the bags. This required me to also carry the Kiinde adapters as part of my pumping kit. While I love the Kiinde system, it poses two problems to my overzealously producing ladies. First, the Kiinde bags do not lay as flat as my usual storage choice, Lansinoh storage bags, and took up more room in my freezer bag. Second, even with the 8 ounce bags I had to be careful, as I would often spill some of the “liquid gold” by bending forward and crushing the bags, allowing milk to spill up and out the flanges and all over me. #boobproblems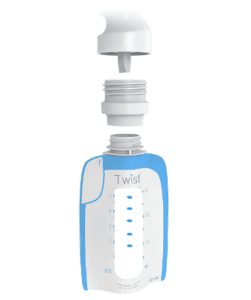
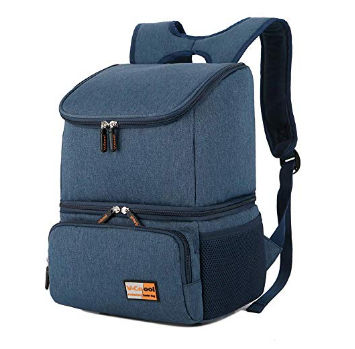
Also in your pumping bag, baby wipes or cleaning wipes for your pump, hand sanitizer, and a cover – because you never know where you will need to pump. You’ll also need ice packs to keep milk and pump parts cool and sanitary after pumping. Personally I chose a pumping bag for my Spectra S1 that had a built in cooler. This simplifies life for me, putting everything I need in one bag and making it super easy to pump anywhere, anytime. 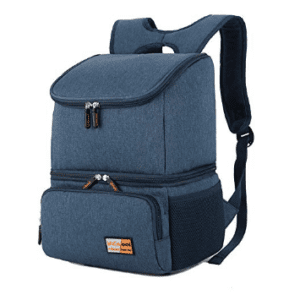
At the end of the day, you’ll need to clean and sanitize your pump parts. Simply pack a cheap bottle brush (like this one from Walmart) and a small travel bottle of dish soap. When it’s time to clean, use the bathroom sink to scrub your parts (I suggest giving it a good scrub with your soap first, just in case) then simply use a hand towel to lay your parts out to dry overnight. In the morning they’ll be clean and ready to go. Easy peasy.
Staying
This part is key. I’m going to say this in bold type, because I really believe it.
It is no one’s responsibility but yours to ensure that you have what you need to pump and store your breastmilk.
I have read multiple posts lately about airplanes with non-working outlets, hotels that won’t accommodate, you name it – someone has complained about it on Facebook. Listen ladies, pumping milk is like any other medical necessity, you need to be prepared for the worst, most uncomfortable situation possible. If you were diabetic, you wouldn’t go on a trip without first ensuring you had your test kit and insulin and that you had a cold place to store your insulin, if needed – don’t assume anything will be supplied, including a room refrigerator.
Pick up the phone, call the hotel, and ask. Ask a manager. Get a name and have a contact so that if something you were promised isn’t made available, you know who to talk to. Don’t rely on the hotel to make your nursing experience cozy, because honestly, even if they are willing to help, sometimes they just don’t have the necessary experience and just don’t get it. Take matters into your own hands and ensure you will be as comfortable (and anxiety-free) as possible.
Things to consider –
Does the room have a refrigerator? Freezer? How large is it?
Would the hotel be willing to store a freezer bag/cooler of milk for you in their deep freezer? Ask what their policies are on this – they may have some expectations they request you meet, especially if the milk is being stored in a food prep/storage area.
Look at the check-in/out times. Will this allow you adequate time to pump when arriving and departing? During my stay, I was actually yelled at by a room service worker for remaining in the room 3 minutes past check-out. Even after I told the employee I was pumping, all the luggage had been removed, and I would be out in 5 minutes – she continued to yell at me to leave. I had asked about late check-out, been told “no”, and prepared to pump early, but then the final session of my conference ran late and here I was in the room 3 minutes past check-out. It happens, even with good planning. Sometimes, you just have to roll with it.
Look at the room location versus where you will need to be during the day. This was especially important for me, since all of the conference activities were in the hotel I was staying in. The location of my room allowed me to go back to my personal space to pump and to leave pumping supplies at the ready for a faster session. You may need to ask about a “private” place to pump during the day if you aren’t lucky enough to be able to use your own room.
Traveling
When you’re ready to head back home, be sure to get any milk from the hotel freezer, as well as any ice packs you may have stored with them. Depending on the length of your drive, you have a ton of inexpensive packing options.
My personal storage system looks like this –
- Pump
- Bag milk, squeezing all the air out of the bag before sealing
- Refrigerate during the day and take daily milk to freezer bag (being stored by the hotel) in the evening
- Lay all milk bags flat in freezer bag to save space (make sure they are sealed tightly before laying down). Be sure to place a flat ice pack on the bottom of the cooler bag before beginning to layer milk bags on top.
When it’s time to travel, simply add any fresh milk to the top of the freezer bag and top with an ice pack. If you will be driving for a longer period of time, you may want to consider a heavier duty cooler with a higher insulation rating.
An alternative to “self-service”, MilkStork has begun helping working moms ship their milk home to baby. The service is fairly expensive, but could be a viable option for some moms. Personally, I would never be able to use this service due to the daily quantity of milk that I am pumping. Their pump and ship program clocks in at $159 for 72 ounce and since this is sometimes what I pump in a day – this service is a bit out of reach for me financially. They do have smaller packages that are less expensive, however, so it’s worth a look.
Finally, if you don’t need to carry the milk home for baby (if, you know, you already 2000+ ounces in your home freezer) consider donating to someone local. Try Human Milk for Human Babies on Facebook. They have a page for each state and promote peer to peer sharing of mother’s milk. I’ve been blessed to donate locally to some amazing mamas through the Human Milk for Human Babies – Pennsylvania page, and am considering checking out the local page for the locale of my work trip coming up in the fall. I’m not particularly fond of flying, and even less fond of the thought of dragging breastmilk through TSA checkpoints.

What are your tricks for traveling while pumping? Share them in the comments below, or let’s start a conversation on our Facebook page. Keep your eyes peeled closer to fall when I’ll revisit this post with tips for air travel.


